House Update: Bathroom Vanity with Marble Contact Paper

We are completing small projects over here until we do our big overhaul this summer.  A couple of weekends ago, I decided that the biggest impact In our master bedroom (besides the floor, walls, and ceiling) would be to update our very dated vanity.

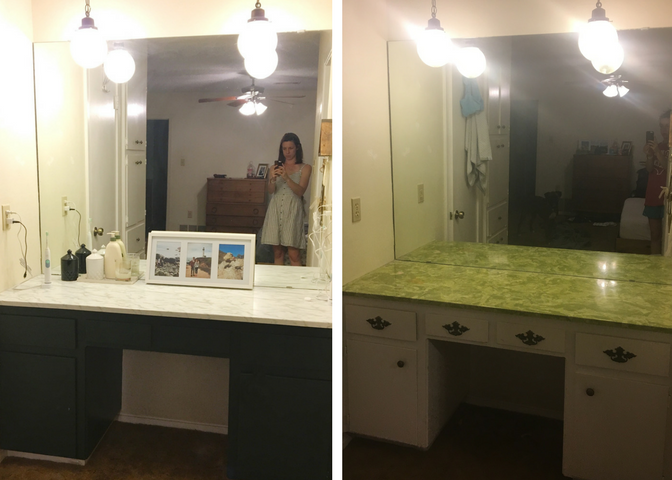
Don't get me wrong, I do love its funkiness.  The light fixtures are my favorite, and I hope that we can salvage them when we do a complete bathroom overhaul, but the green had to go.  And the white paint and hardware had seen better days.  Here is the before.

Look how green it is!  We opted to use contact paper like Jess did In her kitchen.  We figured that since the vanity is not exposed to water and since it is temporary,  contact paper seemed like the perfect solution.

First, I removed the caulk, so that I could get the contact paper to fold around the edges.  Then I realized that it was an impossible task to fit in the crack with the sticky side exposed, so I just did my best.  I will cover it with caulk later.

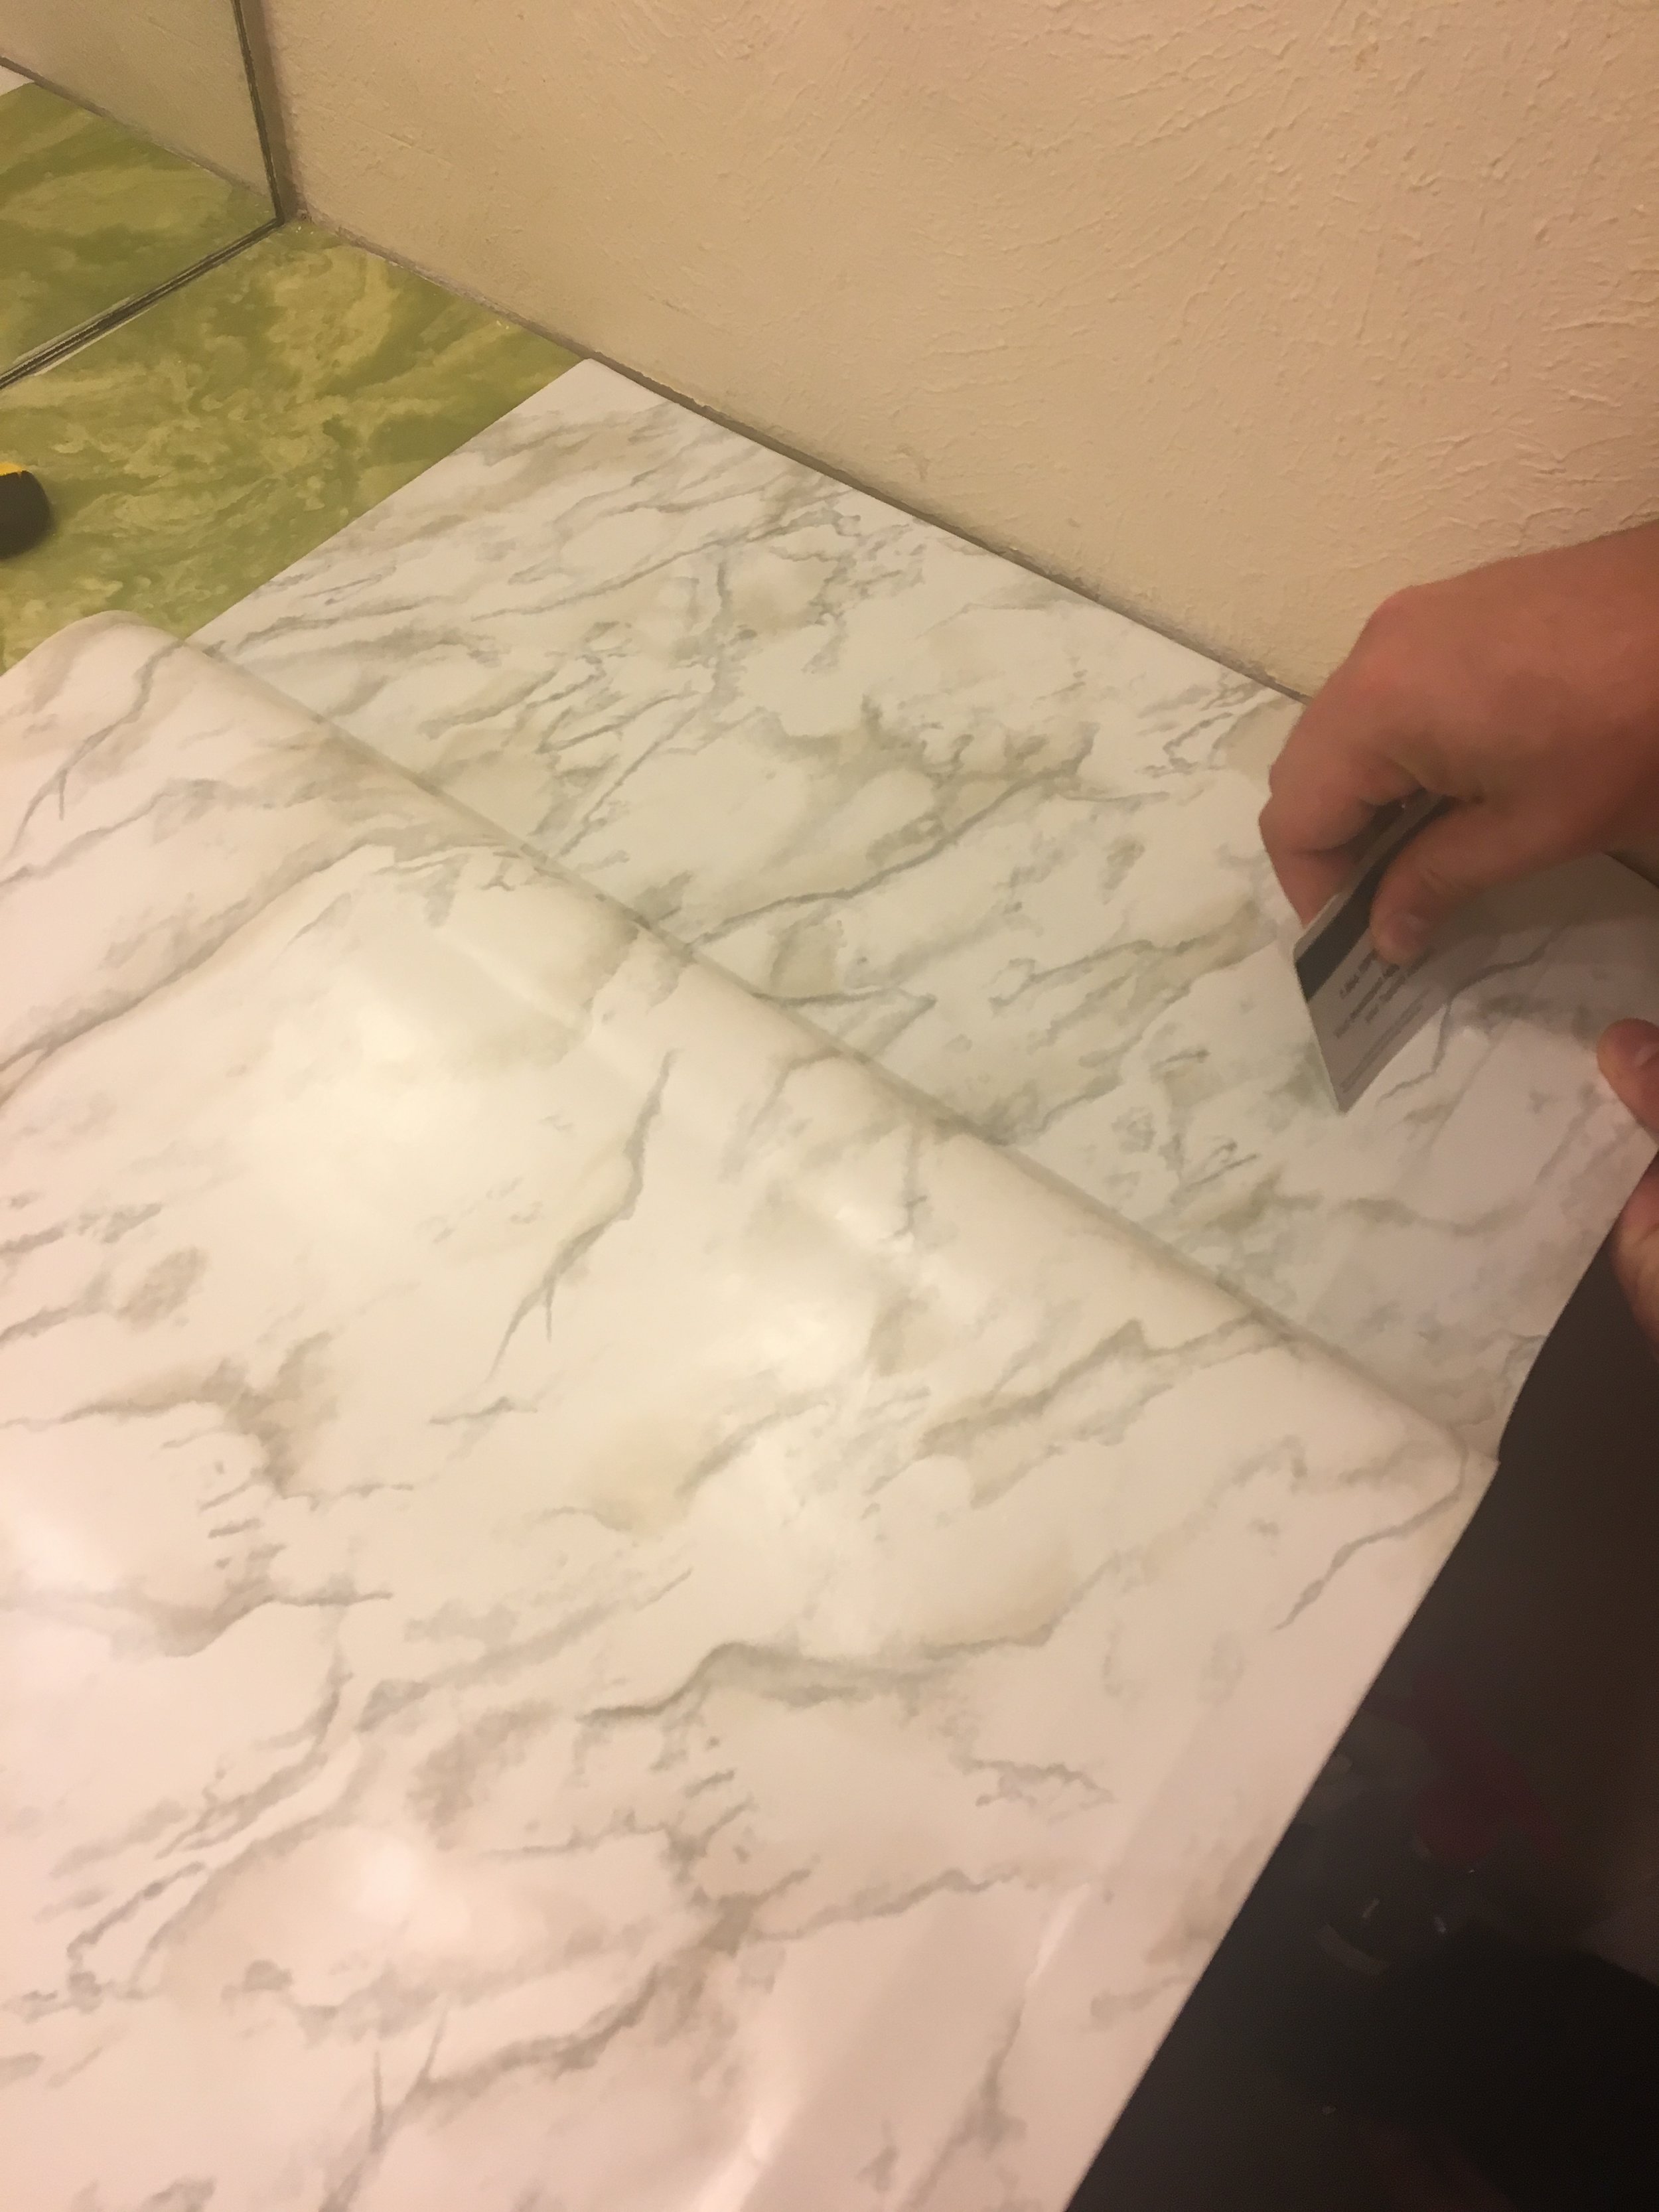
I unrolled and tried to keep everything straight while Taylor used a credit card to express any of the bubbles.

We went as slow as possible, but we still struggled to remove all bubbles.  I didn't take any photos of the second piece we needed to cover the side closest to the mirror because it was quite a disaster to do, but it worked anyway.  Not perfect but much better.

It's pretty amazing how much this looks like real marble.  I removed the hardware, filled the holes with wood filler, sanded, and painted the cabinets. Woohoo!  So much better!

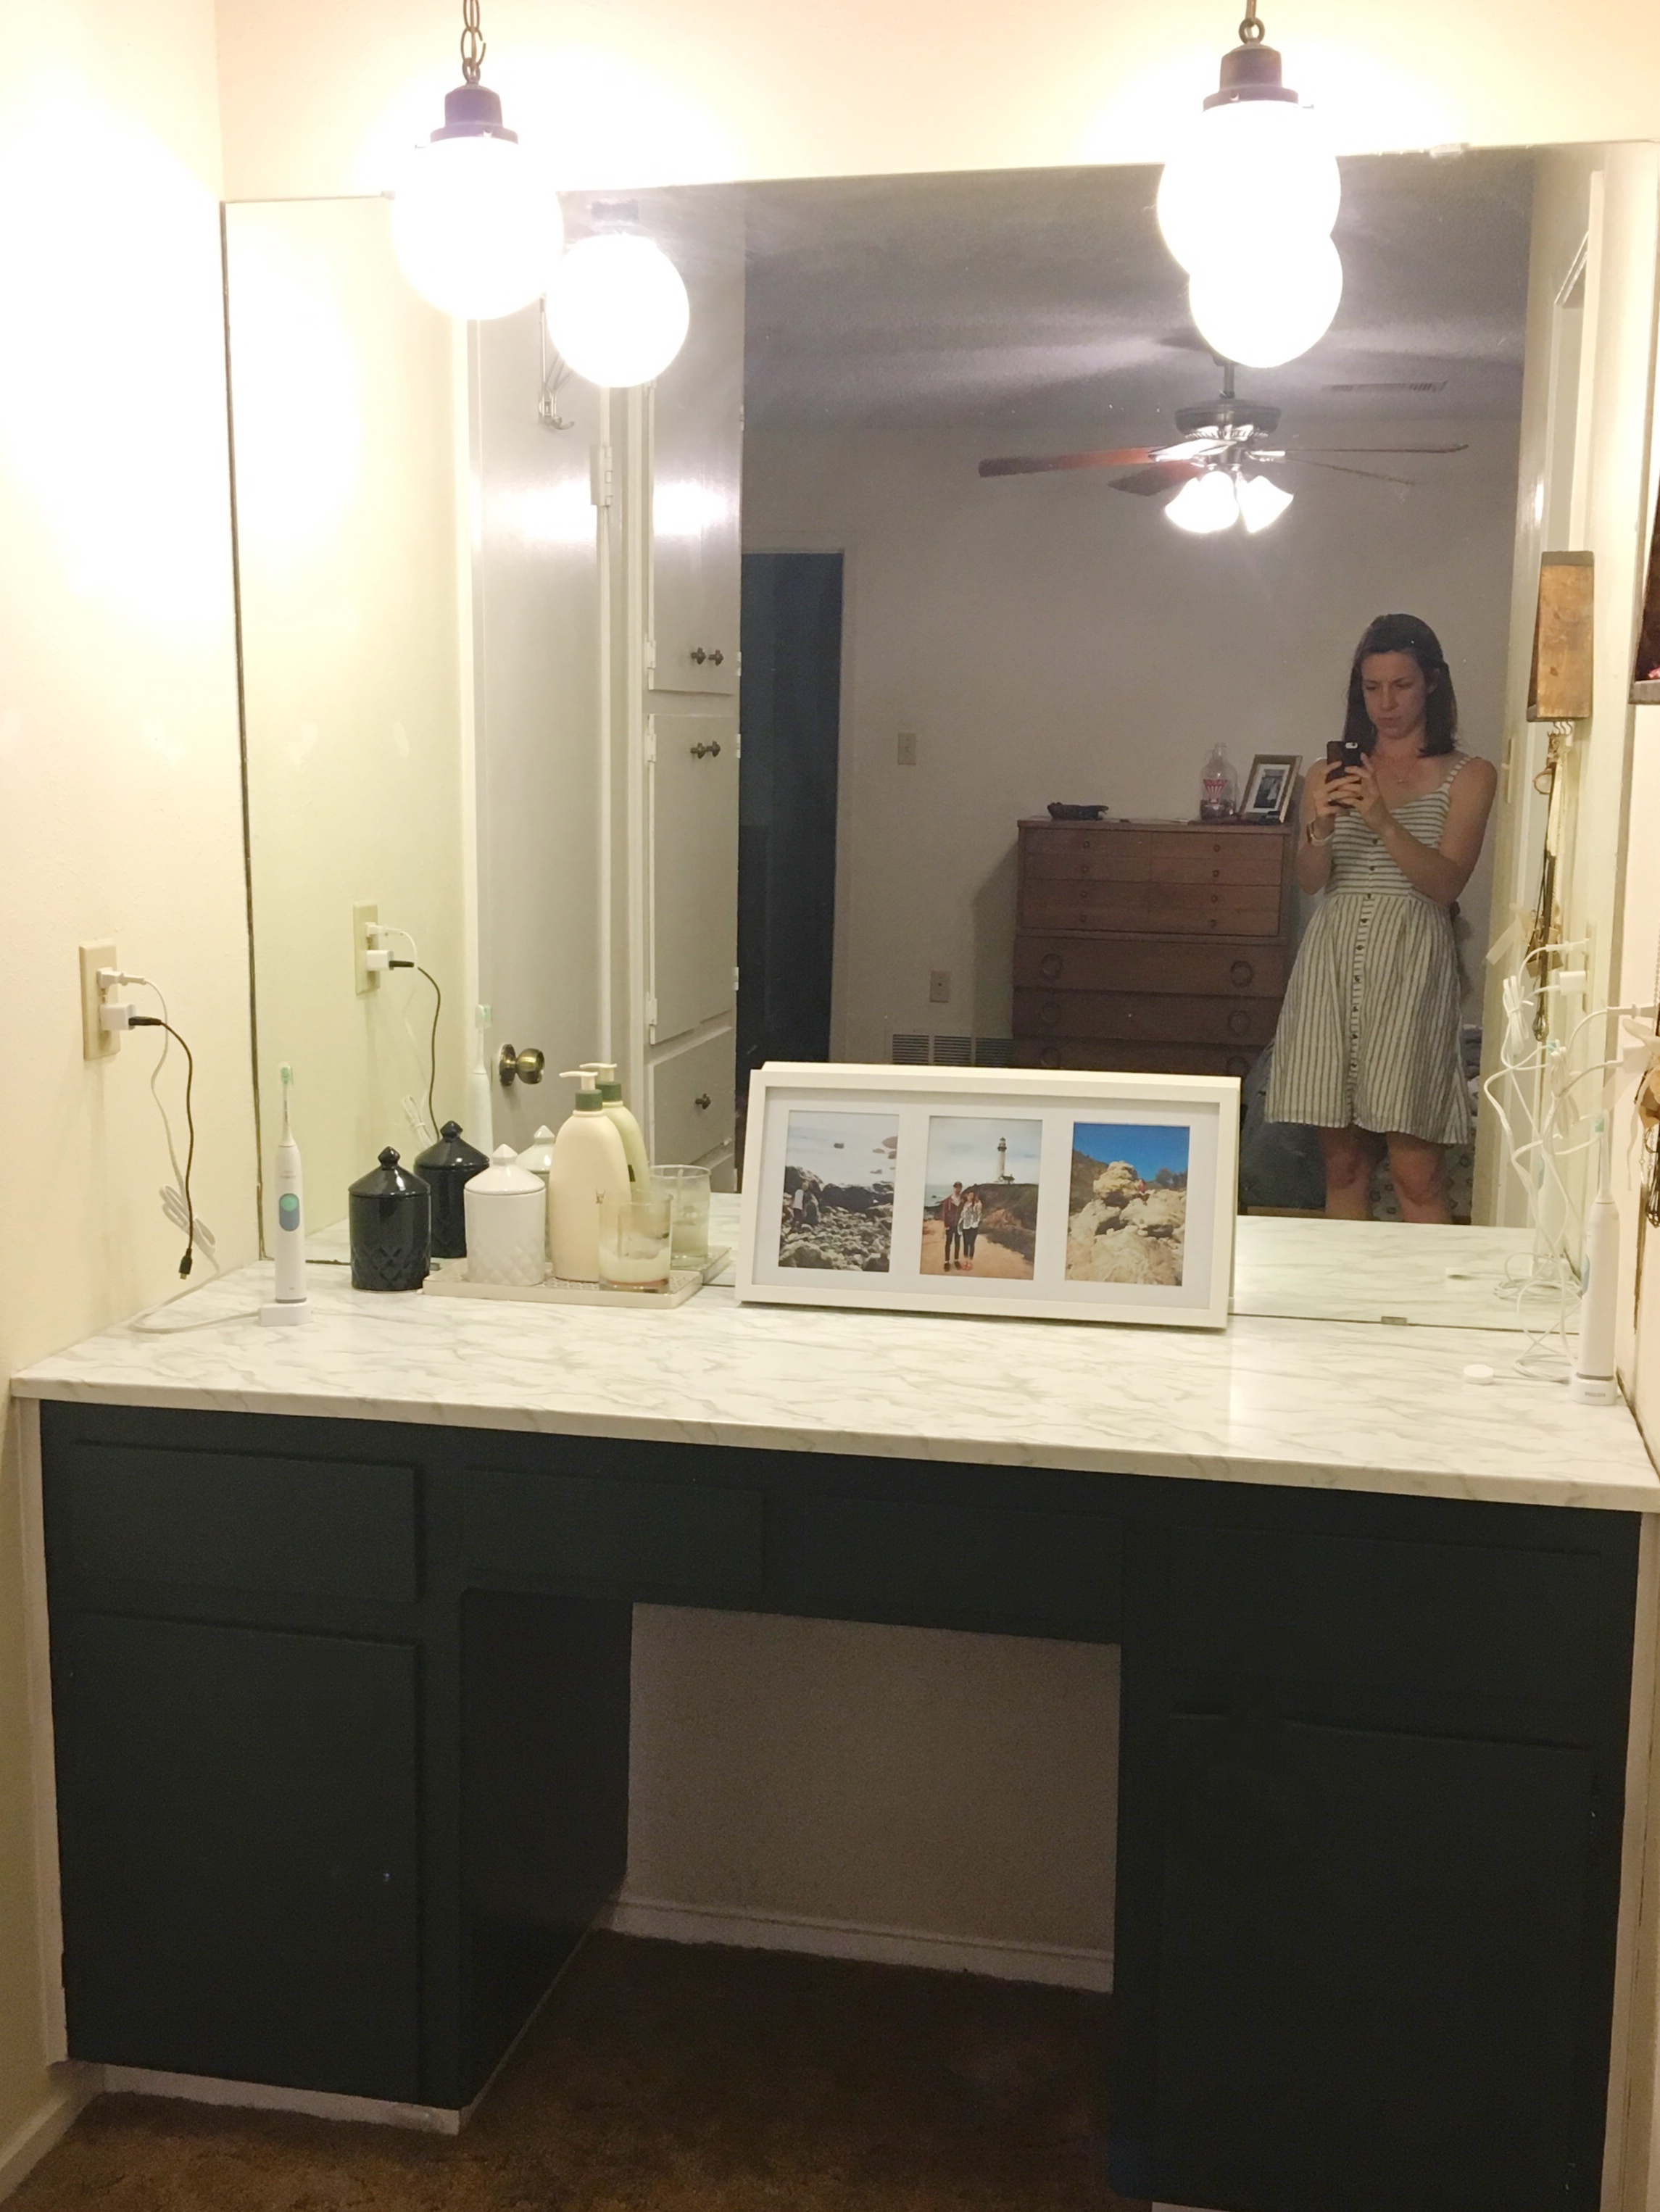
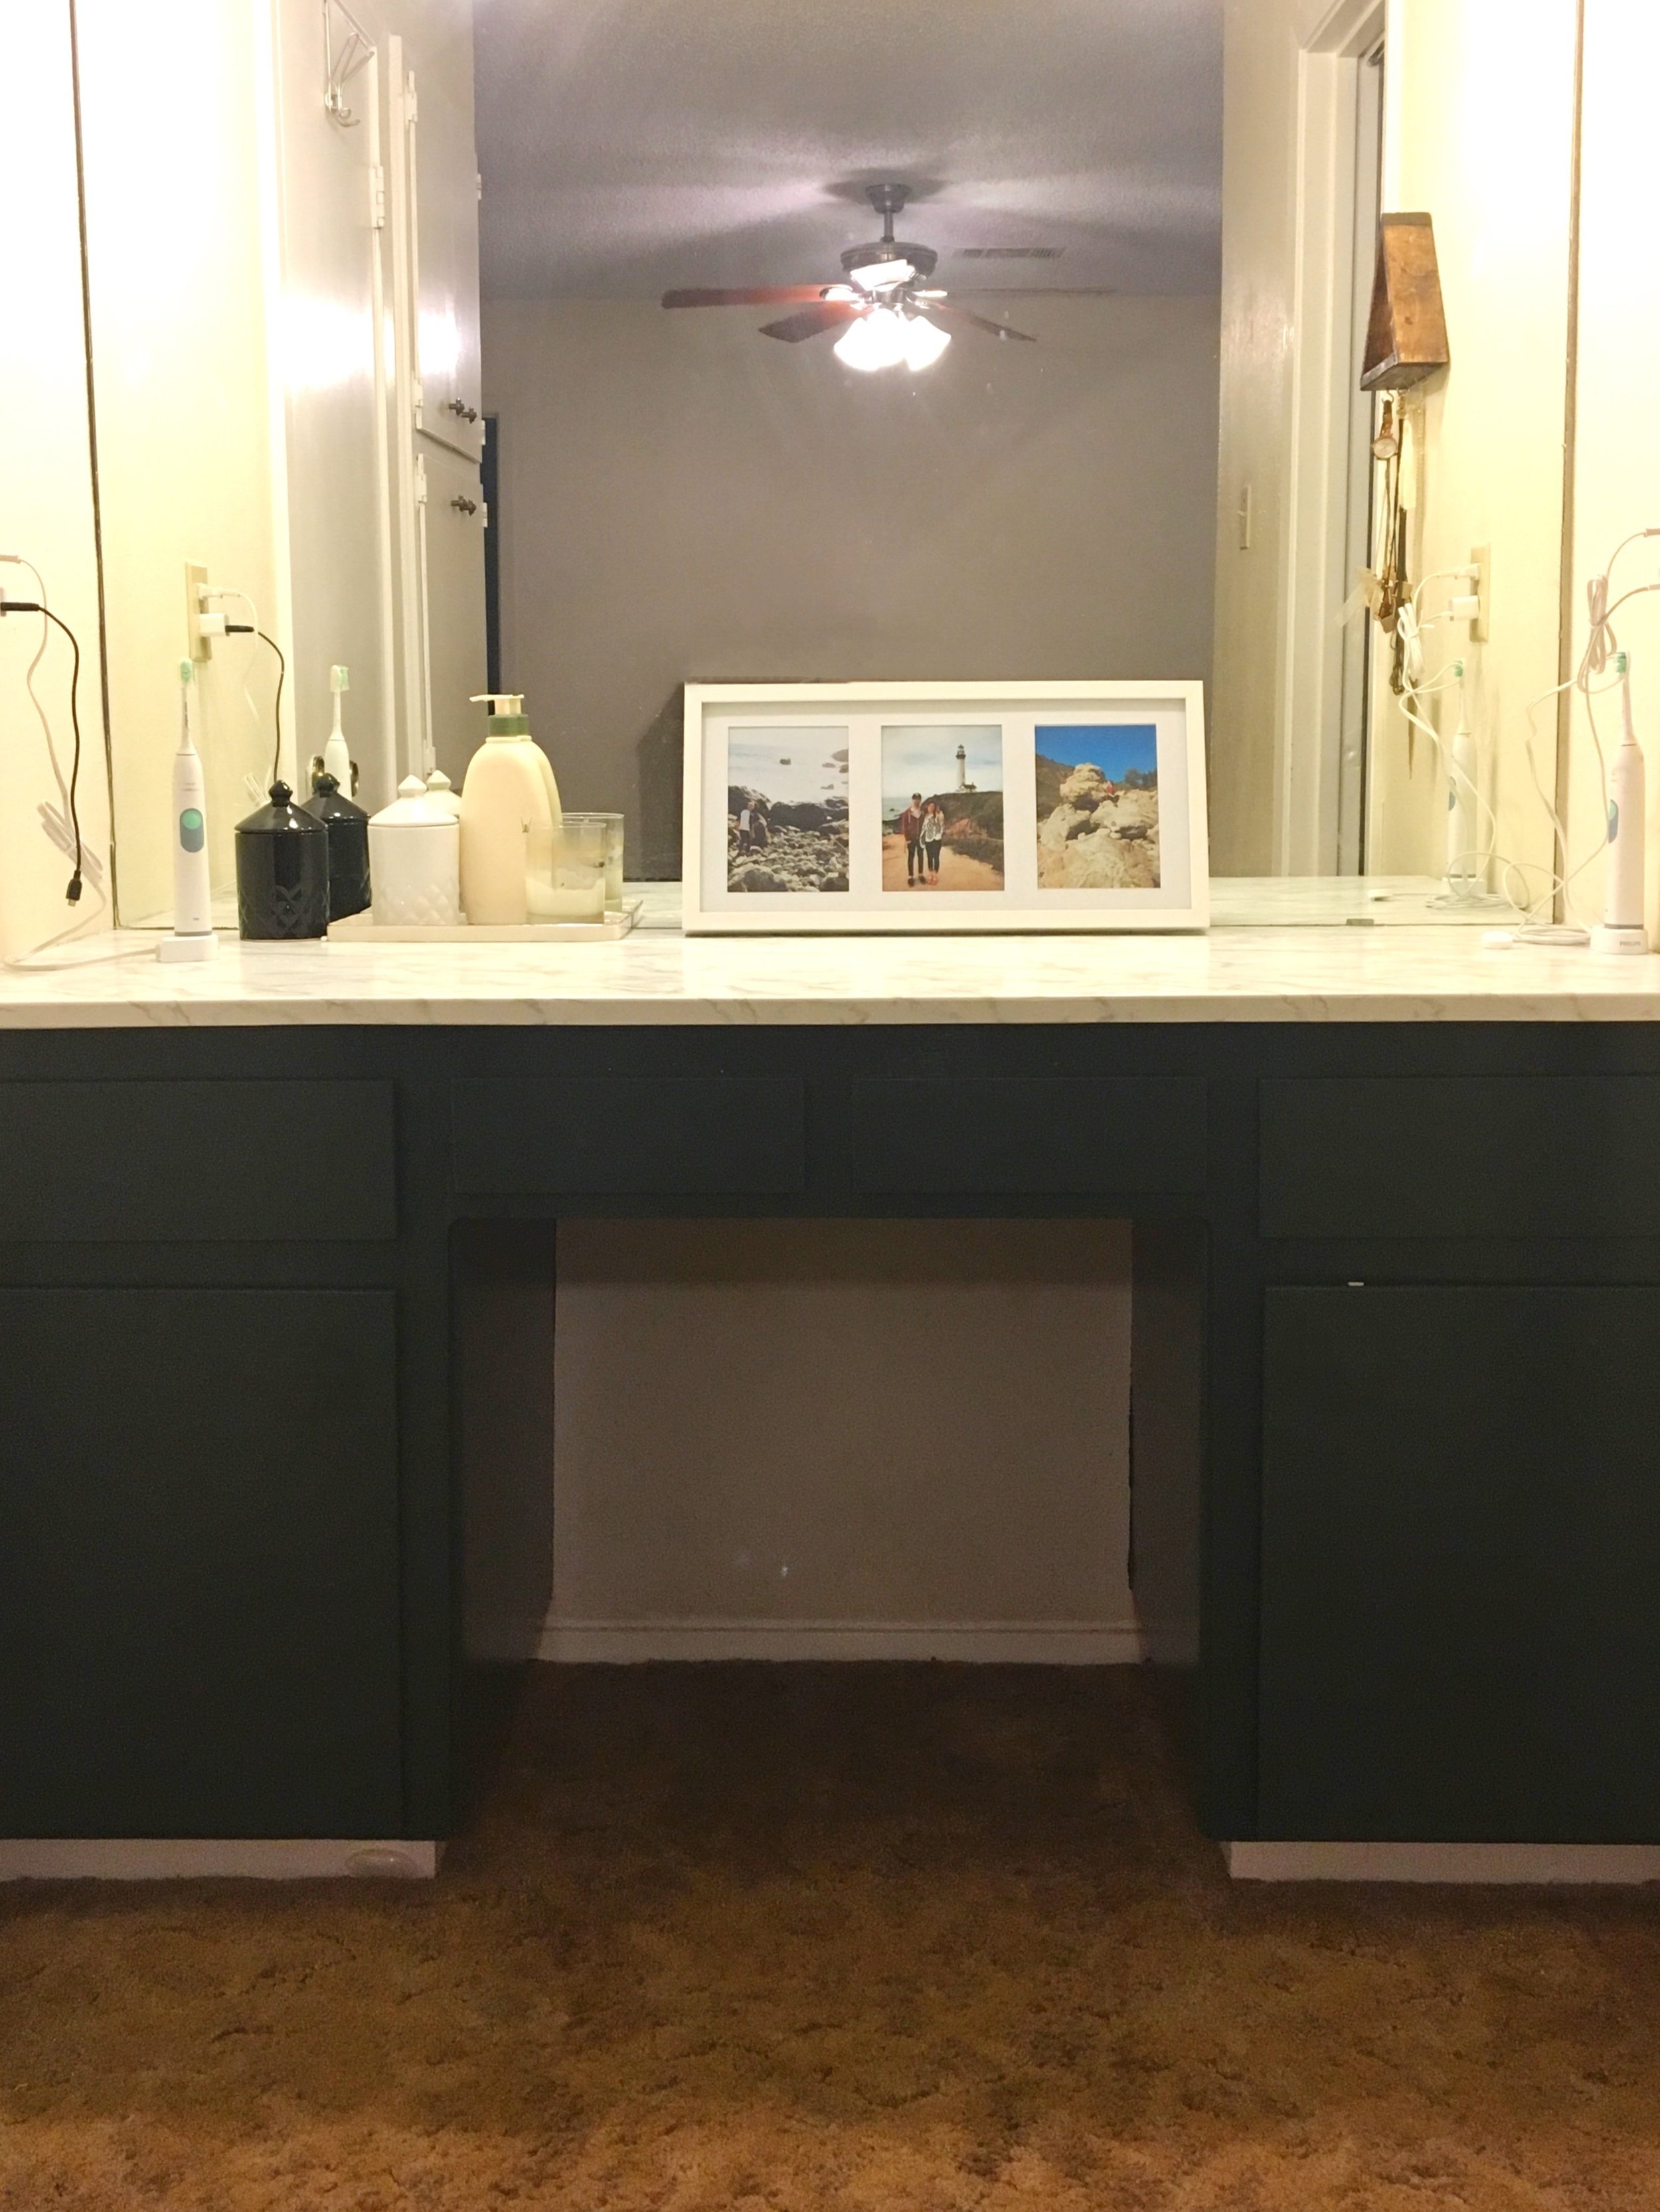
Here is our before and after.  Next up: carpet, walls, and ceiling. NBD.

Untitled design.png

Roundup: DIY Leather Projects

Taylor and my third anniversary is June 8th.  Leave it up to Taylor and myself to come up with a way to make our anniversary into a glorified craft project.  The present for year 3 is supposed to be leather, which gave us an excuse to start a project that we saw on A Beautiful Mess a couple of weeks ago.    

We already had the hairpin legs from a project fail about a year ago, so we only needed to purchase the leather.  Hello, leather is not cheap!  But hey, it is our anniversary!  We followed the directions almost exactly, but added corner pieces so there would be less wood sneaking its way through.

Anyway, now we have all of this leftover leather. Yasss!  This now gives me permission to create tons of little crafts involving my favorite material of all time.  Here are some of my faves.

Keychains by A Beautiful Mess

Hanging Planters by Vintage Revivals

source

source

Leather Pulls by House Tweaking

Leather Blanket Ladder

Leather Mail Catch All by Design Sponge

I am actually going to get started on this letter catch all after I post.  If there is one thing I need, it is a place to put mail that isn't the kitchen counter or dining room table.  Which ones are your favorite?

DIY: Make Your Own Initial Pinata

Hi!  I threw my first baby shower this week, and of course, did a crap job of capturing it.  Even my husband asked several times if I had taken photos, and I was just too busy chatting, refilling food, and drinking margaritas (!).  I made a pinata for their sweet future daughter, Ruby, and it was a fitting piece of decoration for the Fiesta themed shower.

I will update more on how the the shower went, but I wanted to share the project I knocked out back in January (when life was a little slower).   I found the process easy with the right tools, and by the end, I think I figured out the best way to do it!

Sidenote:  This is a pinata that serves no purpose other than decoration.  No candy was beaten out of this guy, so I do not provide instructions on how to do this; I imagine you could easily leave a hole during construction for the filling of candy if your heart so desired.

Supplies: Tissue Paper, Glue Gun, Exacto Knife, Elmer's Glue, and Cardboard (drying dishes optional)

STEP ONE

Draw your letter on a piece of cardboard.  You can see by my picture here that I had lots of revisions before settling on a perfect 'R' but the letter will get covered by tissue, so whatever!

STEP TWO

Cut out your letter.  You will need to duplicate this letter exactly, so use your first letter as a stencil.  Trace and cut out the second letter.  At this point, I had two 'R's.' (I don't know what my punctuation should look like, so please forgive.)

STEP THREE

You will now need to create the dimensional side pieces that will connect your two letter shapes.  I did this by cutting one really long strip and then following it along the outer edges.  (Easier done than explained.)  For the curved pieces, I scored the strip every quarter inch or so.

STEP FOUR

Use approximately 9,000 glue gun sticks to attach all of the pieces.

STEP FIVE

Use Elmer's glue from here on out.  Glue down a layer of tissue paper on top of the cardboard, so that there won't be any brown sneaking its way through.

STEP SIX

Fold your tissue paper and cut into 2" strips.  Fold these 2" strips a couple of times (hamburger style), so that you can cut your fringe in a few quick cuts.  Your fringe must stay attached, so don't cut all the way through or you will have confetti.

CUTTING.jpg

When you unroll it, you will have several pieces of fringe ready to glue.

STEP SEVEN

Begin gluing your fringe to your letter.  Start from the bottom of your shape.  I learned this the hard way.  In order to saturate the color, make sure to provide an overlap.  Notice where I put the glue in the picture below.  The pieces that are hanging off were later cut off.

I worked in small sections until the whole letter was covered.

Pedro approves!  Here it is at the party just hanging out by Spike Jones, our houseplant.

There it is!  I need to find another reason to decorate with pinatas.  I also need to figure out how to put a tilde on my n.  Feel free to comment with suggestions!