
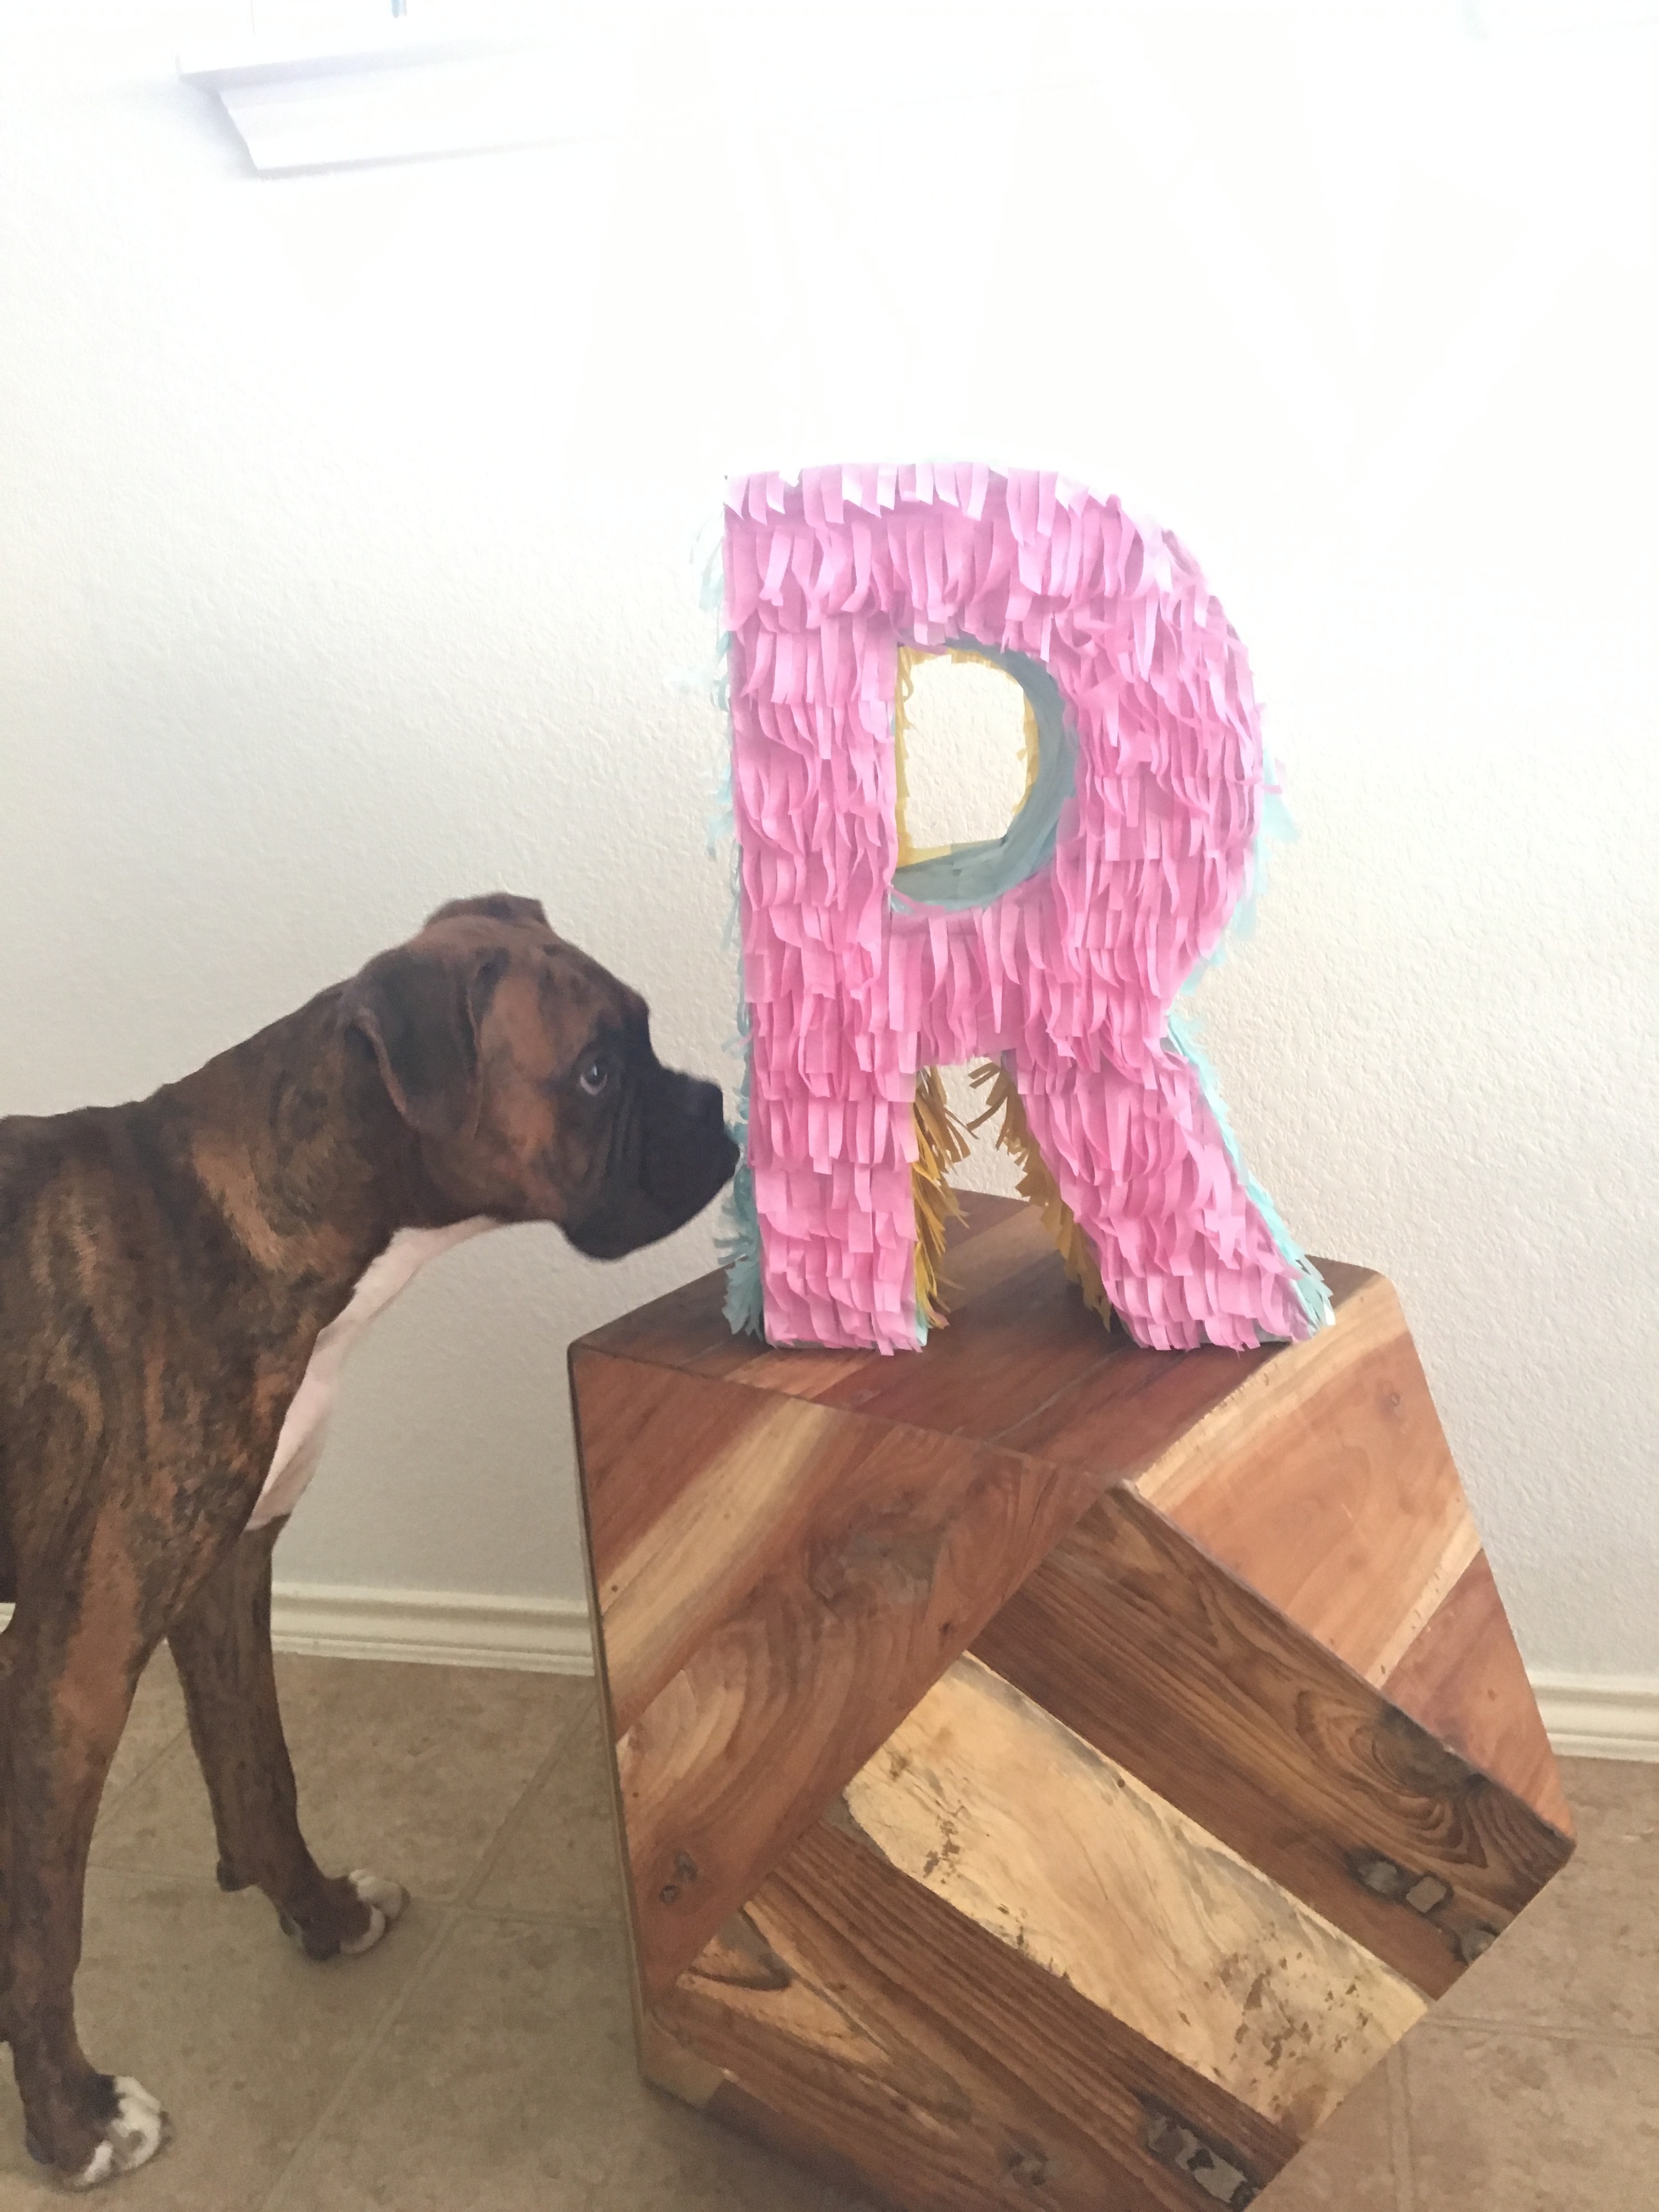
Hi! I threw my first baby shower this week, and of course, did a crap job of capturing it. Even my husband asked several times if I had taken photos, and I was just too busy chatting, refilling food, and drinking margaritas (!). I made a pinata for their sweet future daughter, Ruby, and it was a fitting piece of decoration for the Fiesta themed shower.
I will update more on how the the shower went, but I wanted to share the project I knocked out back in January (when life was a little slower). I found the process easy with the right tools, and by the end, I think I figured out the best way to do it!
Sidenote: This is a pinata that serves no purpose other than decoration. No candy was beaten out of this guy, so I do not provide instructions on how to do this; I imagine you could easily leave a hole during construction for the filling of candy if your heart so desired.
Supplies: Tissue Paper, Glue Gun, Exacto Knife, Elmer's Glue, and Cardboard (drying dishes optional)

STEP ONE
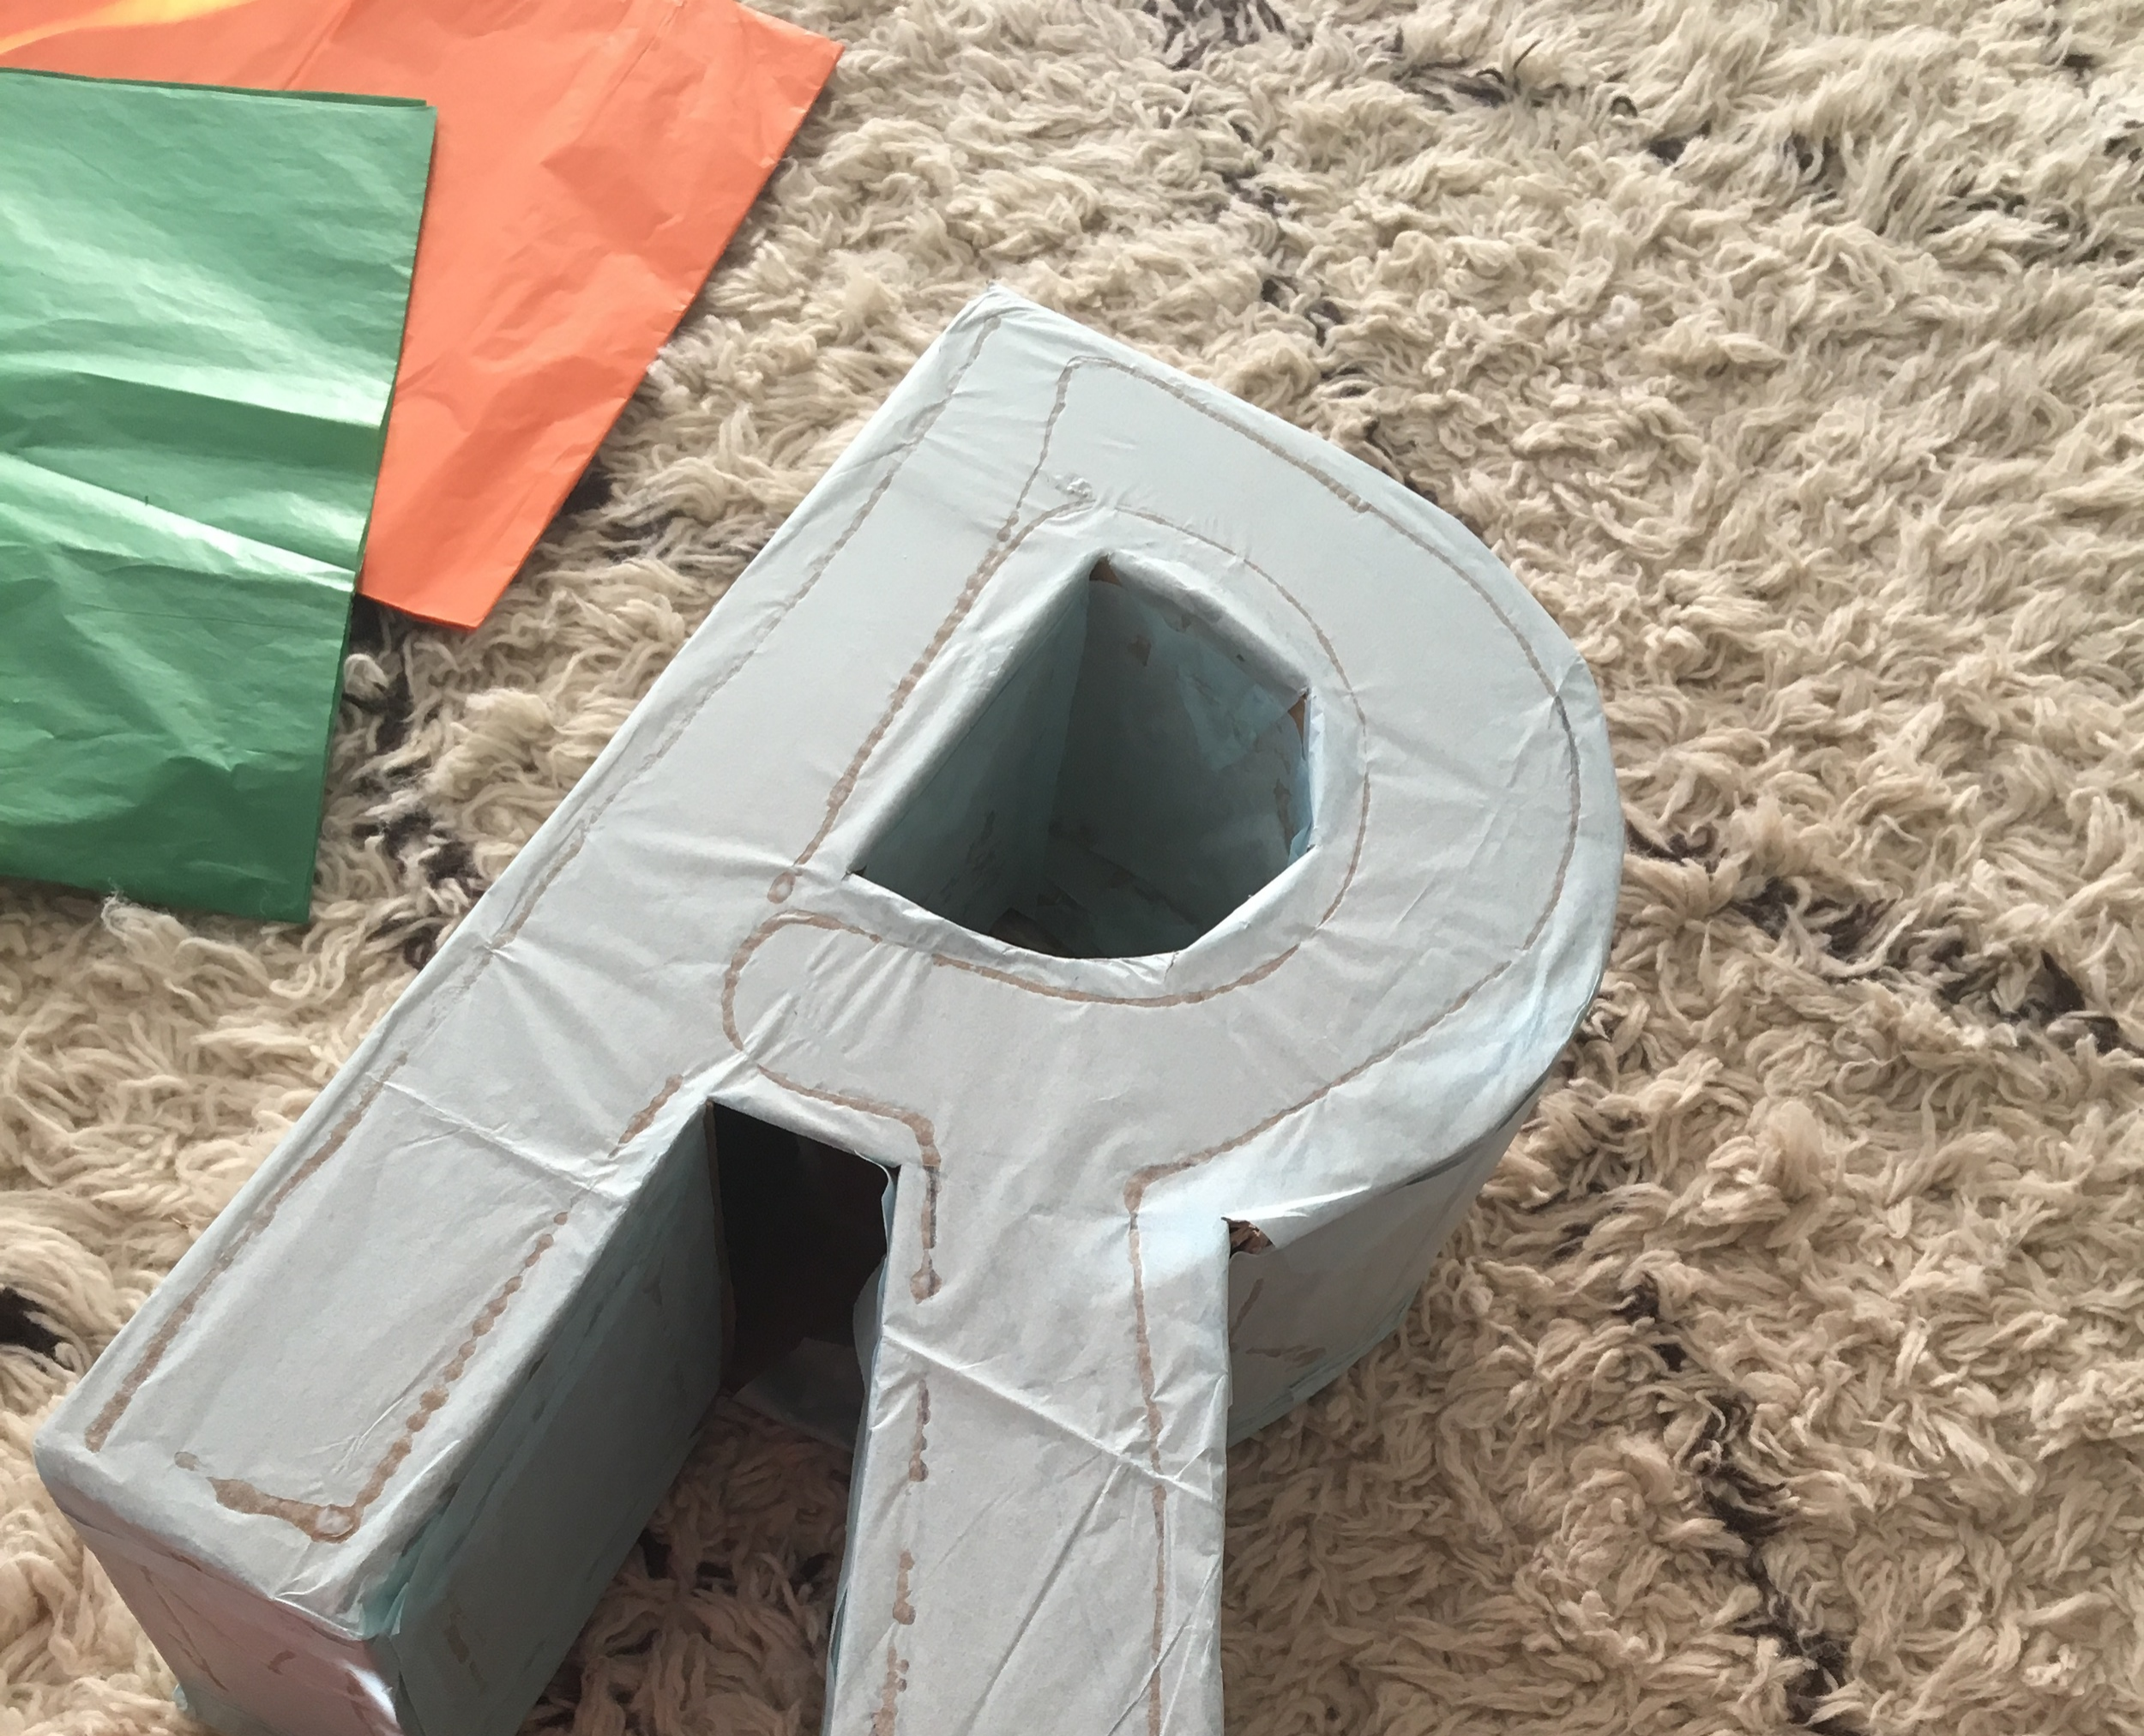
Draw your letter on a piece of cardboard. You can see by my picture here that I had lots of revisions before settling on a perfect 'R' but the letter will get covered by tissue, so whatever!
STEP TWO
Cut out your letter. You will need to duplicate this letter exactly, so use your first letter as a stencil. Trace and cut out the second letter. At this point, I had two 'R's.' (I don't know what my punctuation should look like, so please forgive.)
STEP THREE
You will now need to create the dimensional side pieces that will connect your two letter shapes. I did this by cutting one really long strip and then following it along the outer edges. (Easier done than explained.) For the curved pieces, I scored the strip every quarter inch or so.
STEP FOUR
Use approximately 9,000 glue gun sticks to attach all of the pieces.
STEP FIVE
Use Elmer's glue from here on out. Glue down a layer of tissue paper on top of the cardboard, so that there won't be any brown sneaking its way through.
STEP SIX
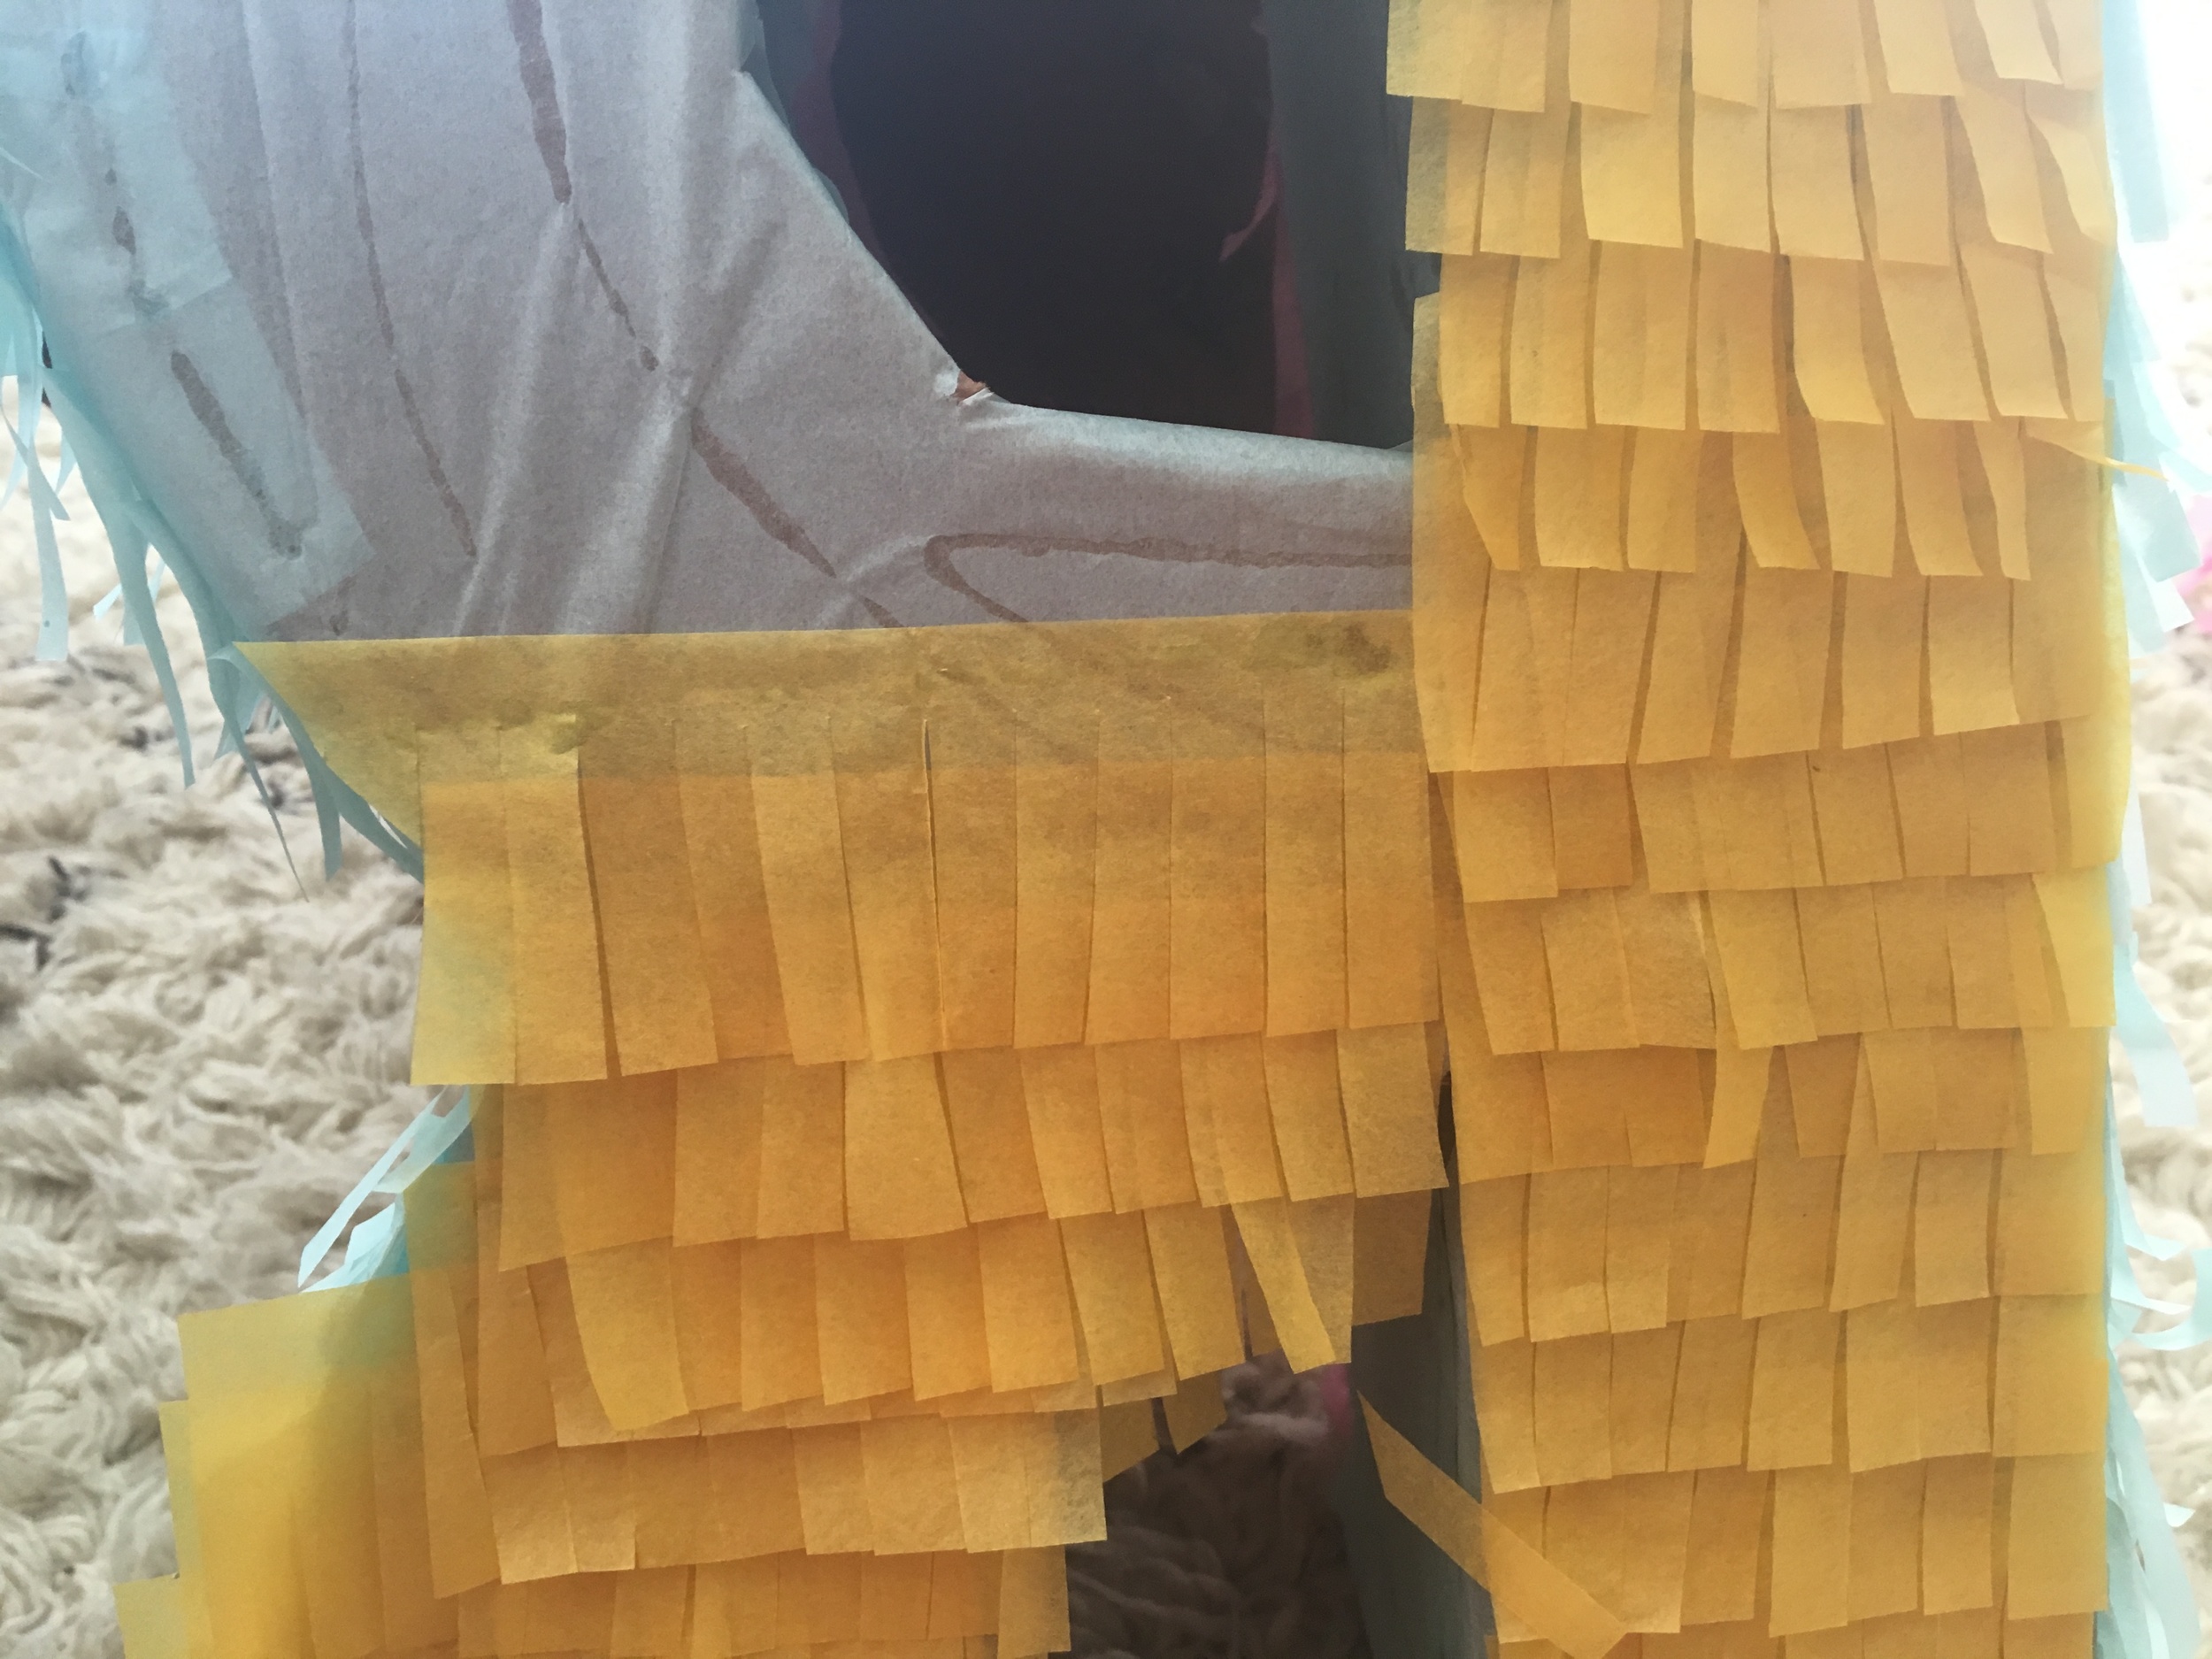
Fold your tissue paper and cut into 2" strips. Fold these 2" strips a couple of times (hamburger style), so that you can cut your fringe in a few quick cuts. Your fringe must stay attached, so don't cut all the way through or you will have confetti.

When you unroll it, you will have several pieces of fringe ready to glue.

STEP SEVEN
Begin gluing your fringe to your letter. Start from the bottom of your shape. I learned this the hard way. In order to saturate the color, make sure to provide an overlap. Notice where I put the glue in the picture below. The pieces that are hanging off were later cut off.


I worked in small sections until the whole letter was covered.


Pedro approves! Here it is at the party just hanging out by Spike Jones, our houseplant.

There it is! I need to find another reason to decorate with pinatas. I also need to figure out how to put a tilde on my n. Feel free to comment with suggestions!